Category Archives: Equipment Review

New solar panels for Island Bound

2/13/2019
Boot Key Harbor, Marathon FL
Posted by Bill

In March of 2015, we installed 4 – 100 watt flex solar panels on our bimini canvas. We were staying at a private marina with access to a really nice work area, and Tricia did the sewing on the canvas. 2 of the panels had zippers attached to the sides, and the other 2 were plain. She sewed zippers into the canvas along with a protective flap, as we were not sure if the panels would chafe through the bimini due to wind movement and/or vibration. She also sewed Velcro and a protective flap for the other 2 panels and we attached Velcro to the underside of those panels. The design of the installation worked very well, and when the panels had to be removed for hurricane prep or maintenance on the bimini, it was really hard to get the Velcro ones off! The surface of the panels crazed and degraded after 3 years and so we needed to replace them. We bought them in Marathon FL from a reputable dealer and we had a 5 year warranty, and even though the manufacturer had gone out of business, the dealer honored the warranty and ordered us new panels from a different manufacturer. We could not get zippered panels, and the size of the new ones was slightly bigger, which made the existing bimini modifications unusable, so we needed to change the way the panels were attached.

Our bimini and dodger canvas is on it’s last leg. Tricia has been making repairs for the last 5 years and the canvas is not holding new thread. It will be replaced at the end of this cruising season. We feared that if we had to remove the bimini and do a bunch of sewing, we would have bigger issues than just the failed solar panels, so we needed to some up with a solution that did not involve removing the bimini, and something that could be done on the boat in the mooring field we are staying at. Tricia had been looking at some fasteners called Loxx that she saw in a Sailrite catalogue. They have a top and bottom component, and you pull the top to lock or unlock the connection of the two. Both the base and the top have a ring that screws on to them, which sandwiches the component to whatever material you are working with. They also have little spikes on the components to hold them in place when you screw the ring on. So we thought this would make a great solution given our restrictions. Here is a picture of a top component:
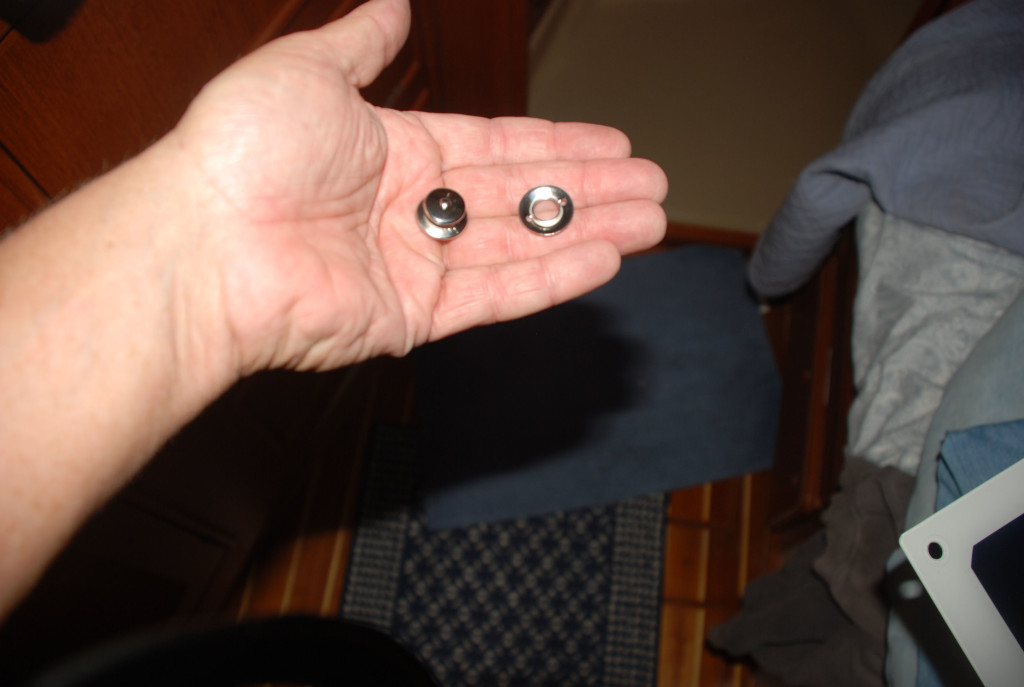
DSC_0513cmp

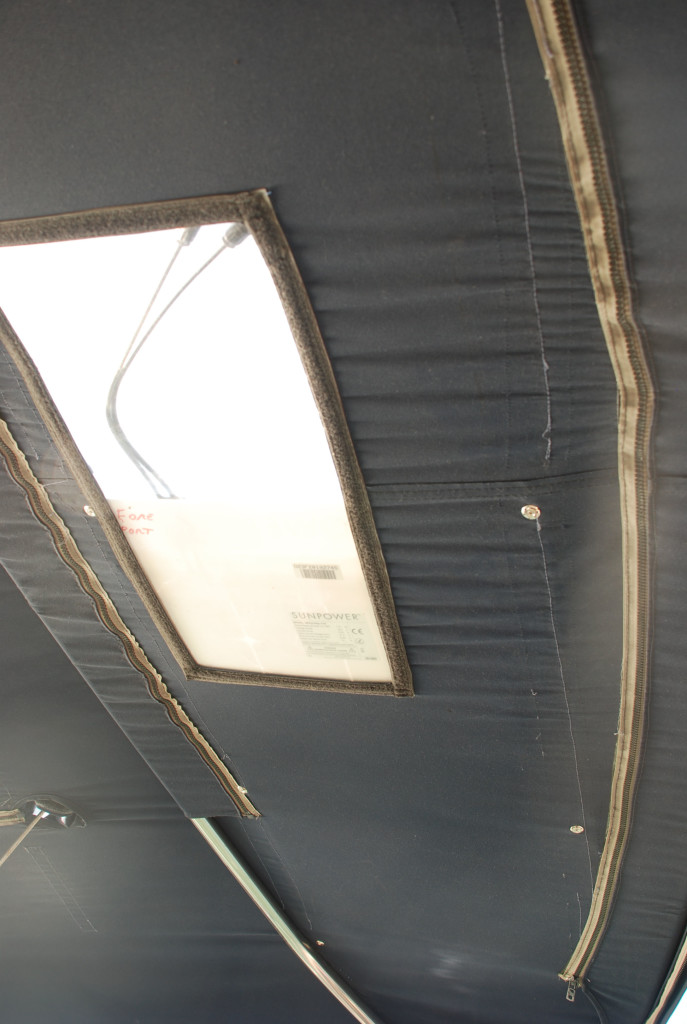
We first confirmed that they could be attached to the new panels and then we placed the panels on the bimini to determine the best strategy to use in attaching them. As it turned out, the protective flaps from the old installation still protected the bimini, except for the outer ends of the panels, which were longer than the old ones. Here is what remains after removing the old panels:
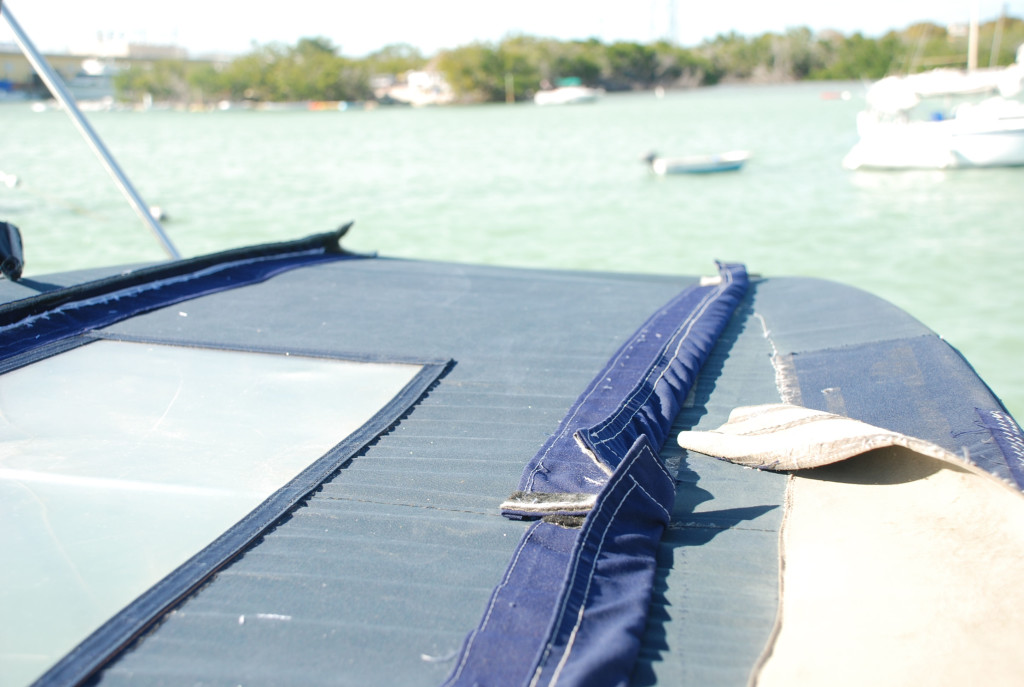
DSC_0509cmp

Tricia used squares of Velcro for the outer ends to remedy that and provide chafe protection for the outside edges. As you can see in this picture the panels have 6 holes to use for mounting:
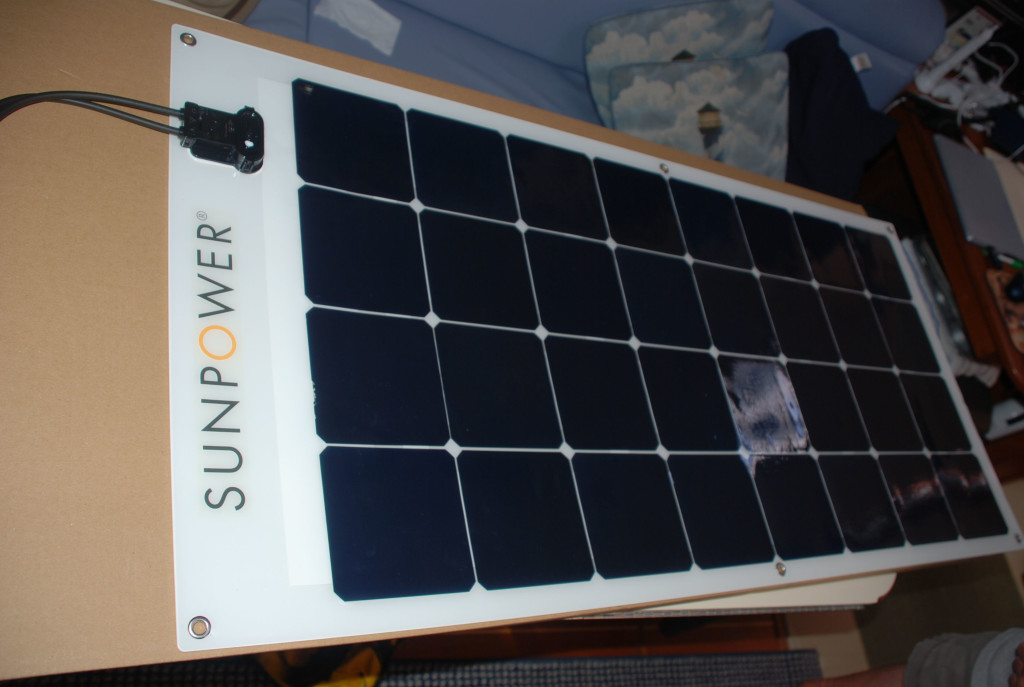
DSC_0503cmp
We did one panel at a time and one or two holes at a time, installing the panel before determining the location of the next hole.

Step 1 – Remove the grommets on the panel. The Loxx would not fit on the panel with the grommets on. We used a wire cutter tool, flipped the panel over, and worked the cutter tool under the grommet. Working all the way around the grommet and squeezing the grommet allowed us to form it to a size smaller than the hole, and then just pull it out the other side.
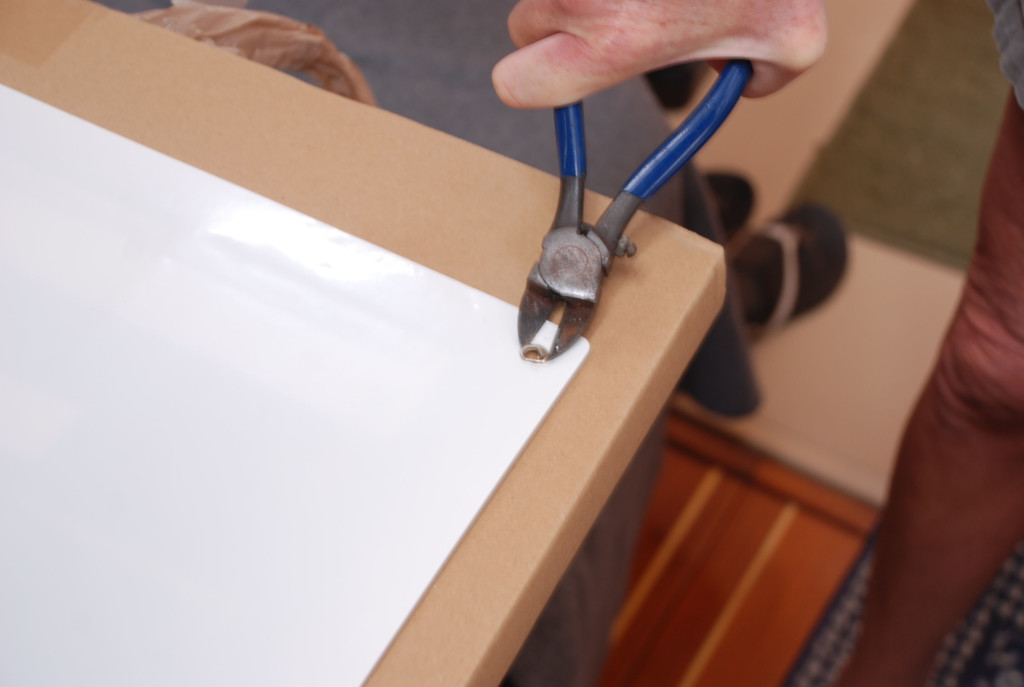
DSC_0499cmp
DSC_0501cmp
Step 2 – The holes were still about 1/16th of an inch smaller than the Loxx components, so I used a dremel grinding cone to widen them.
Step 3 – Press the Loxx top component into the hole and use a pair of needle nose pliers to work around the component, pressing the teeth into the panel.
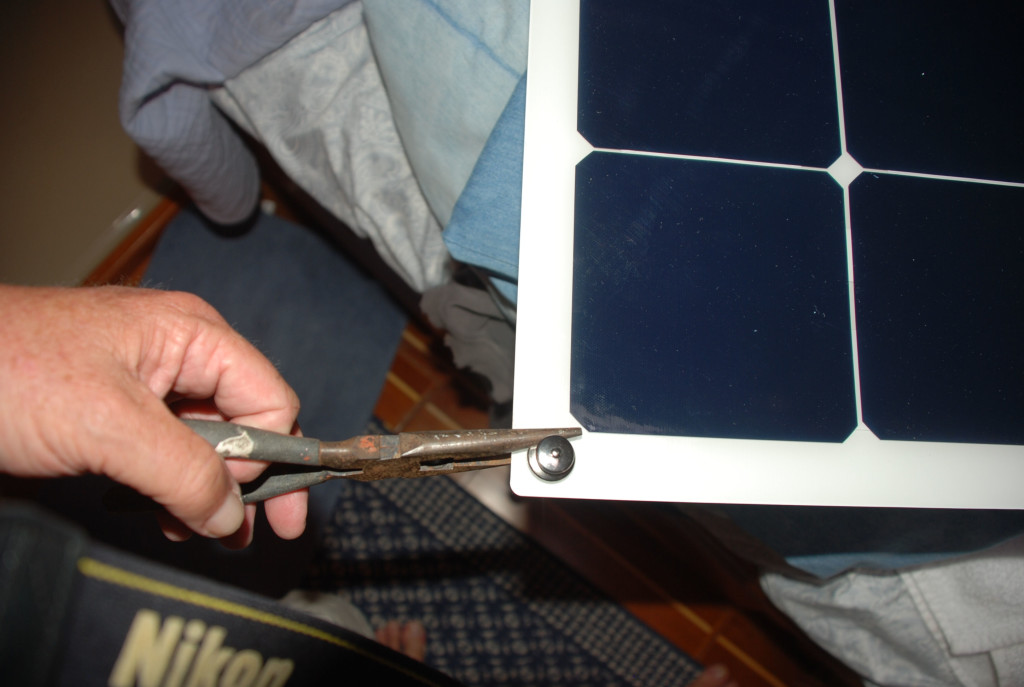
DSC_0514cmp
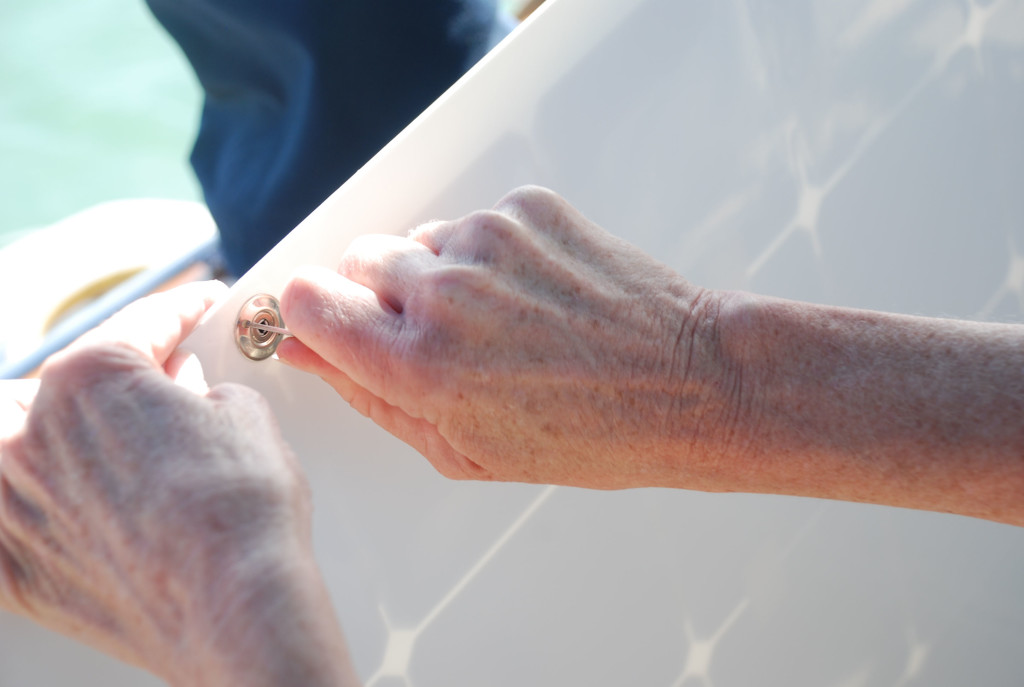
Step 4 – Install the Loxx ring and use their special tool to tighten the ring snuggly.
DSC_0518cmp
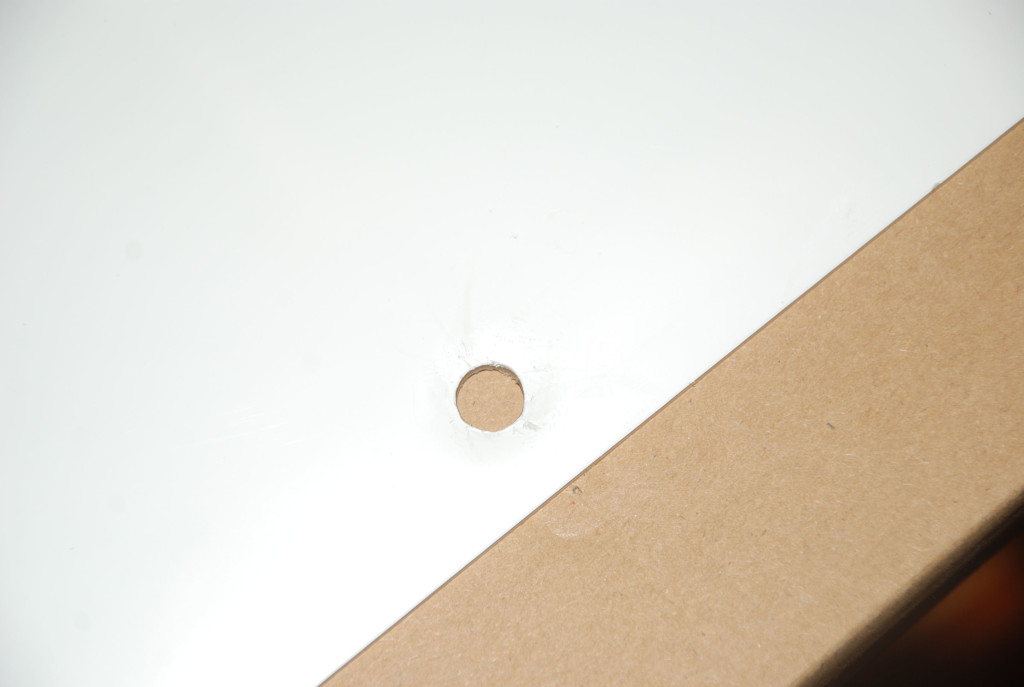
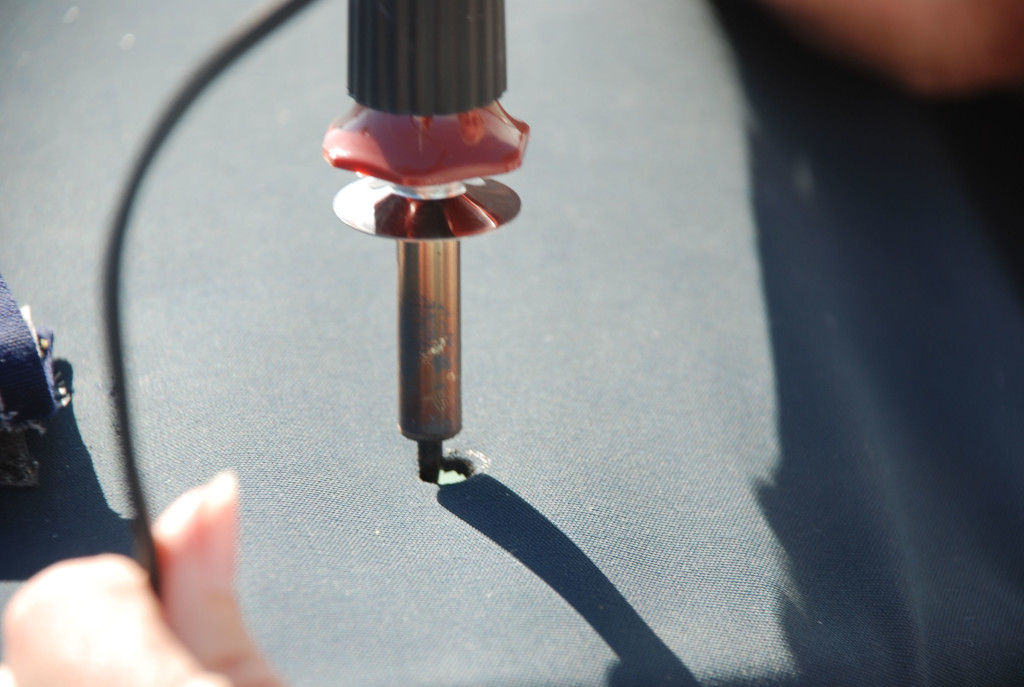
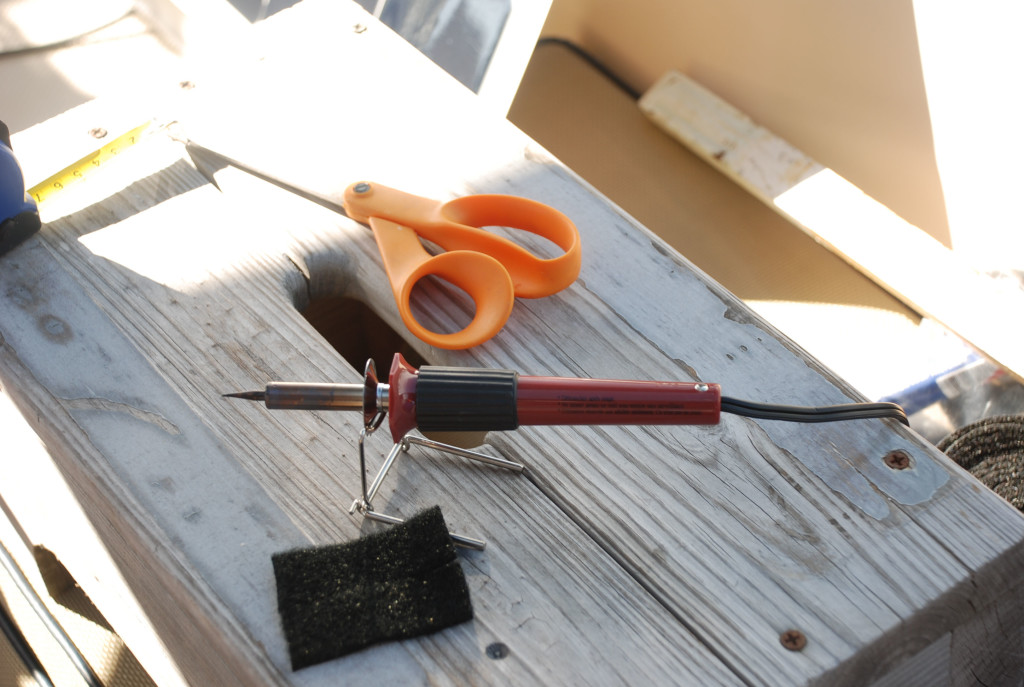
Step 5 – Create a hole in the bimini to put the Loxx base component. We used a hot knife tool to cut the holes. It turned out that the barrel of the hot knife was the perfect size for the Loxx component.
DSC_0504cmp
DSC_0506cmp
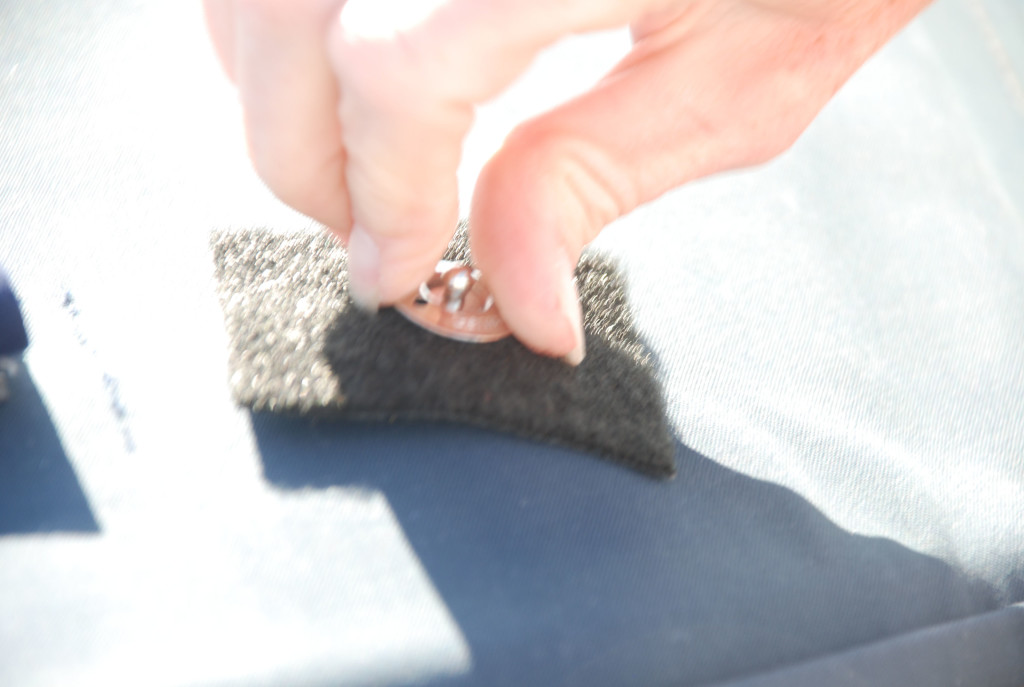
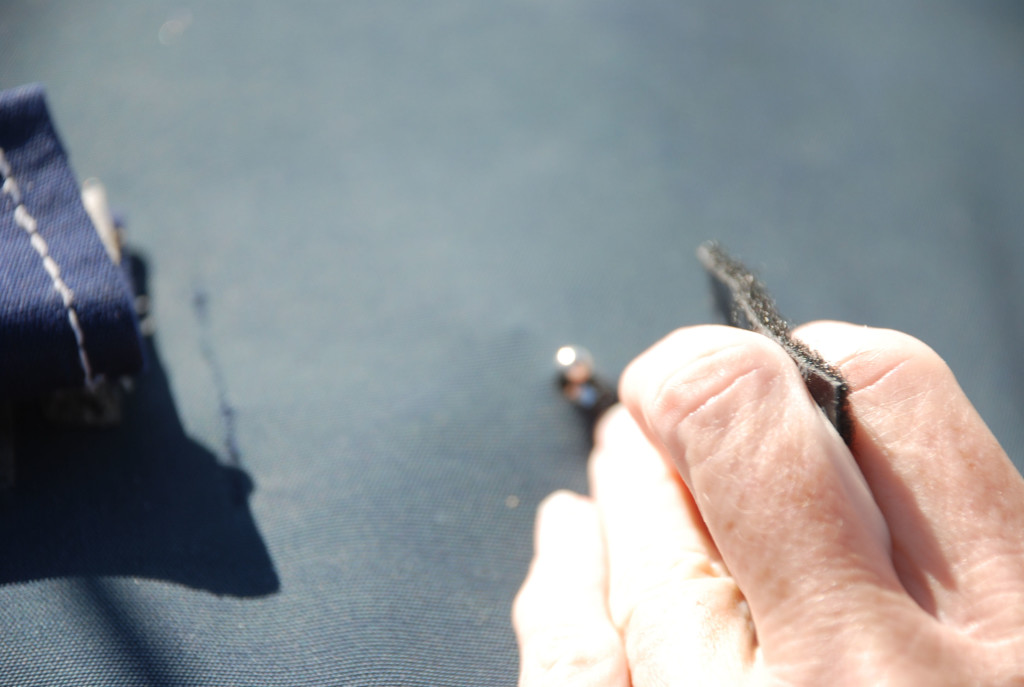
Step 6 – Insert the base component into the canvas and screw on the ring on the top side of the canvas, using the special tool to tighten.
DSC_0505cmp
DSC_0507cmp
Step 7 – Install the panel on to the base and measure for the next hole.
Step 8 through X – Repeat the process for all six holes and for the other panels.

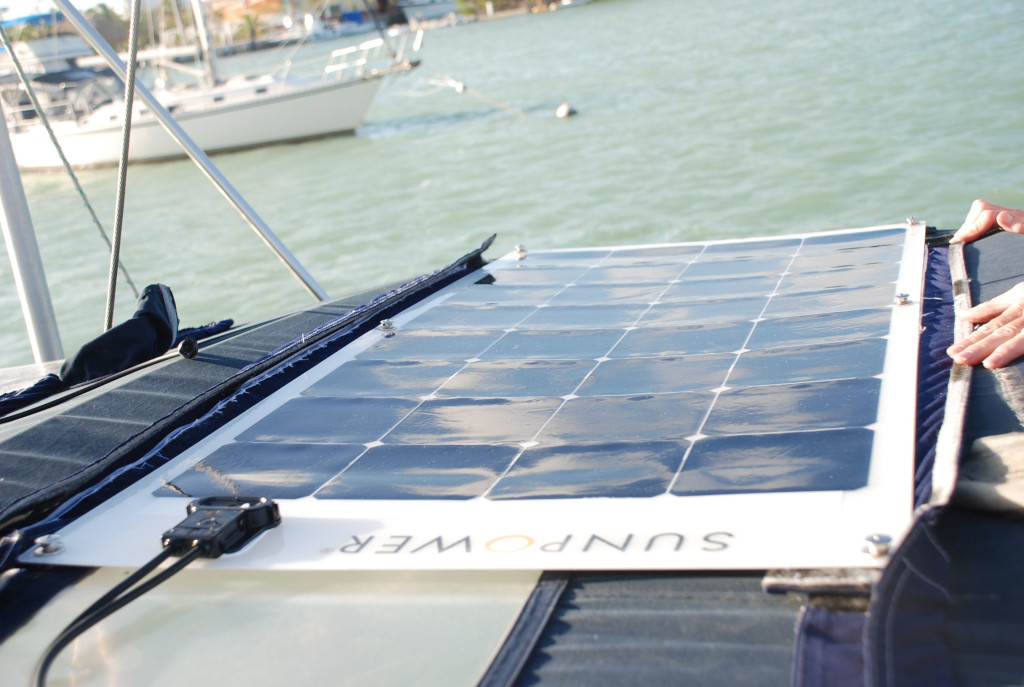
Here is the top view of the installed panel:
DSC_0523cmp

And the underside:
DSC_0524cmp

We connected the wires in series and found that we needed an extension cable for one of the connections. The wires on the new panels were shorter than the old ones. We had the company we bought the panels from make us a 2 foot extension and we are making power with wild abandon.

We thought the Loxx base would leak water, but they have not. If we weren’t getting new canvas this summer, we would have opted to install the bases on a patch of canvas that would then be sewn into the bimini, which would not create holes and would provide support for the bimini canvas. We highly recommend the Loxx fasteners!

Island Bound’s water maker installation

9/19/16
Southport NC
Posted by Bill

We have been trying to get all of our boat projects done before we leave to go south November 1. Most of them require work to be done outside so the weather has been a factor and we are behind schedule (which always seems to be the case). I finally finished the water maker installation last week…yay! We decided to put one in so that we can been self sufficient with fresh water, especially in the Bahamas and other remote areas where water is not available. The tank on our boat holds 170 gallons of fresh water, which we can make last a couple of months if we are really frugal, but for a few thousand dollars we can make our own and not be afraid to take showers every day! Our friends Mark and Jan on the other Island Bound have a water maker, and they graciously made water for us as we traveled last cruising season, and we got to see how much more comfortable life can be when you have that capability. We will still be very diligent about conserving fresh water, but can relax the conservation efforts to a more comfortable level. As always, we try to post information about these types of projects to help other cruisers with their projects.

I did a lot of research about what type of system to put in. There are systems that run off of the battery bank, and systems that run off of AC current which require a generator. There are pluses and minuses to each, just like everything, and you have to pick something based on your specific situation. We opted to go with an AC current solution. The main reason is that it will make 25 gallons per hour of fresh water, which is 2 to 3 times the GPH rating of the 12 volt systems. It can run off of our Honda generator very efficiently with no impact to our battery bank. There are also portable systems (costing well over $5k) and permanently installed systems. As you will see, I opted to design one that is a hybrid. By removing 8 screws, I can remove the system from the boat. Also, the permanent systems use plumbing that is connected to thru hulls in the boat, which feed sea water and dump brine (waste) water, and are plumbed to dump fresh water into the tank below decks. I set ours up to pull sea water from a pump thrown overboard at the back of the boat, dump brine near the same place, and add fresh water to the tank through the deck fill hose. This allowed us to keep the system simple, as the permanent install requires several additional valves and hoses to sample fresh water and inject pickling solution (pickling is the process of preserving the reverse osmosis membrane when it will not be in use for several months).

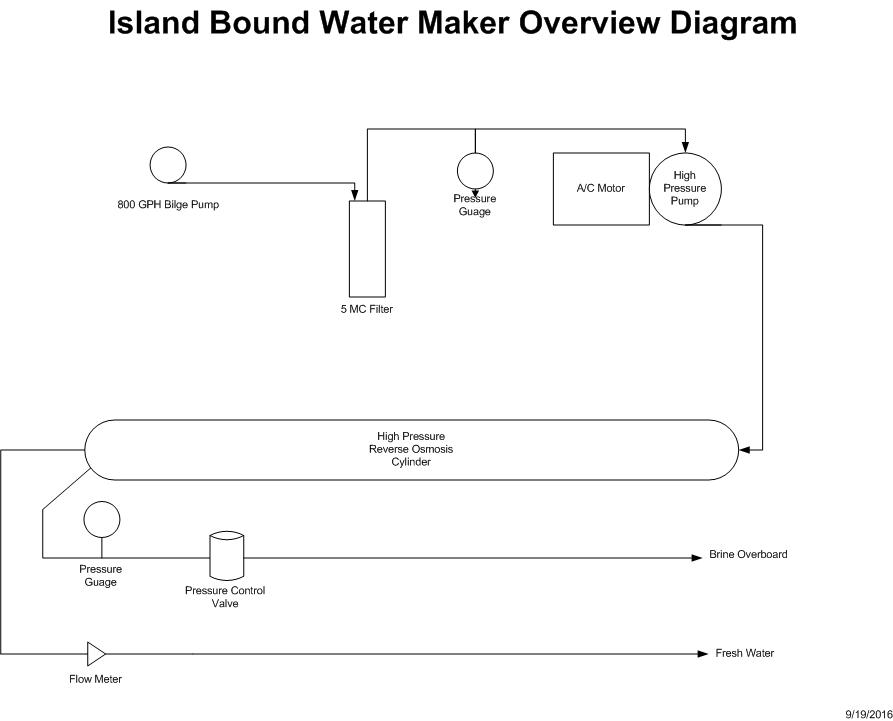
This diagram shows the basic components and the flow of water:
island-bound-water-maker-overview-diagram
With this system, water can be sampled from the same hose that is used to fill the fresh water tank, and the membrane can be pickled from the same bilge pump that is thrown overboard to feed sea water to the system. No need for thru hulls, and no need for multiple inputs and outputs. The components are housed in our cockpit locker and the system can be operated by opening the lid and pulling out 3 hoses. I bought a kit on Ebay that included most of the components and then supplemented with separate purchases for things I changed in the design.

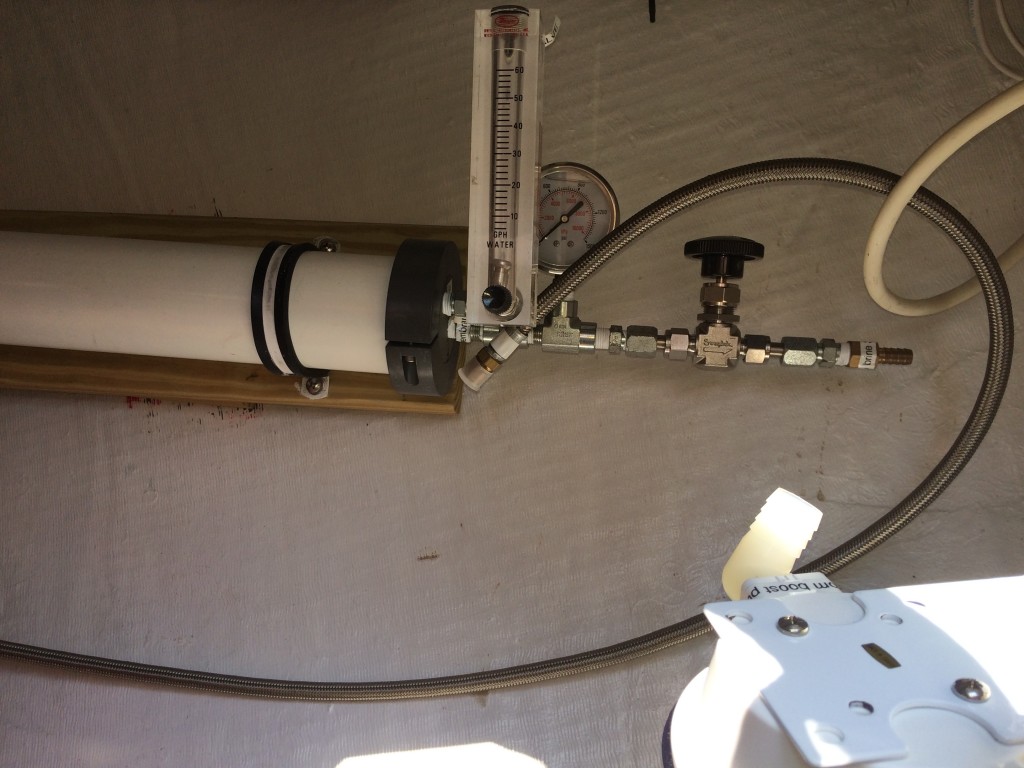
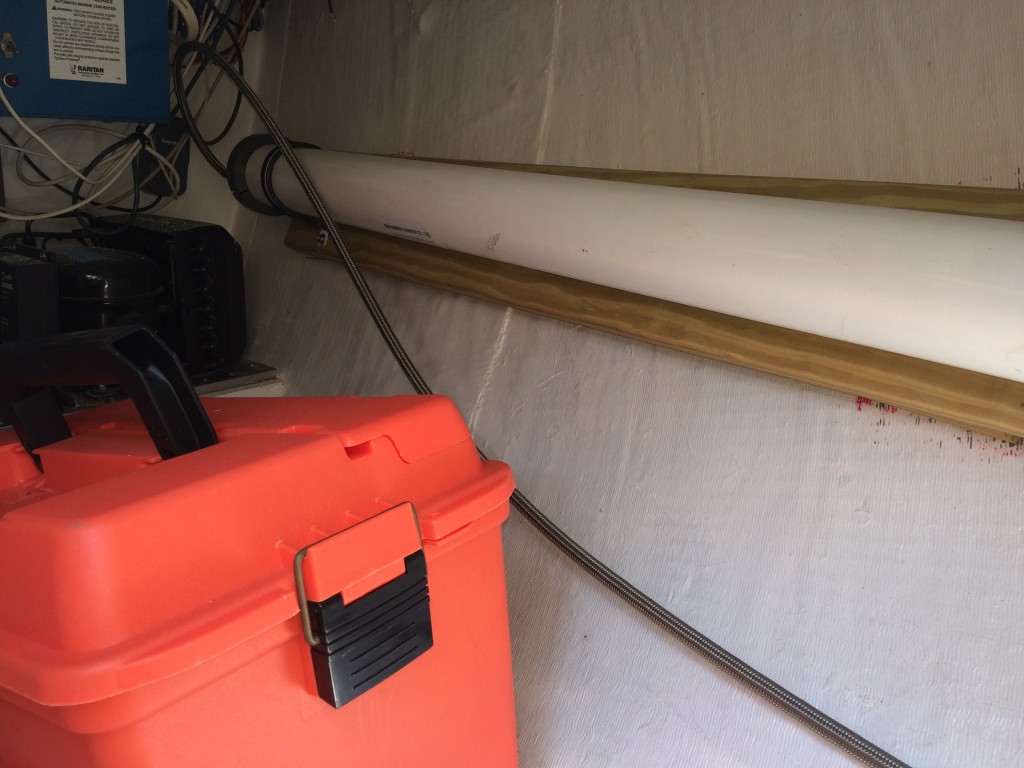
I installed the high pressure cylinder along the hull on the inside of the cockpit locker, well out of the way of stored items (FYI..this isn’t the finished installation).
img_2510
img_2511
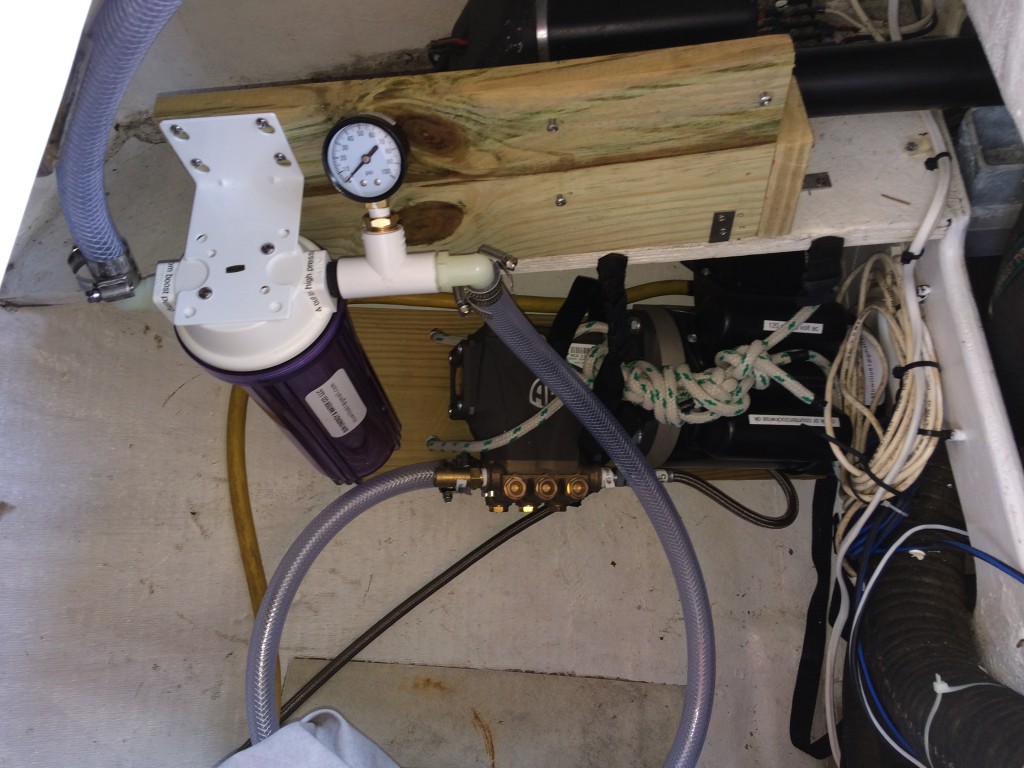
The first picture shows the end of the cylinder that has the flow meter and pressure control valve. It is very easy to get to and monitor. Along the back of the locker is the high pressure pump, motor and pre-filter.
img_2516
The hoses neatly coil up and store behind the filter when they are not in use. The high pressure pump can run in the locker or can be lifted out to run in the cockpit. I used an old shore power chord to wire the high pressure pump motor so that I could plug the chord into the shore power receptacle of the Honda generator (model EU2000i companion). The bilge pump that feeds the sea water is wired to an AC to DC power converter that plugs into the 110 volt receptacle of the Honda generator. To use the system, you essentially deploy the hoses, start the generator, plug in the power chords, allow the system to run for a few minutes, crank up the pressure, fill your fresh water tank, and then flush the system with 4 gallons of fresh water. I haven’t tallied up the total cost yet, but I think it will come in around $2,500; which is pretty good for a water maker.

Highfield CL-290 inflatable RIB dinghy

7/31/2016
Southport NC
Posted by Bill

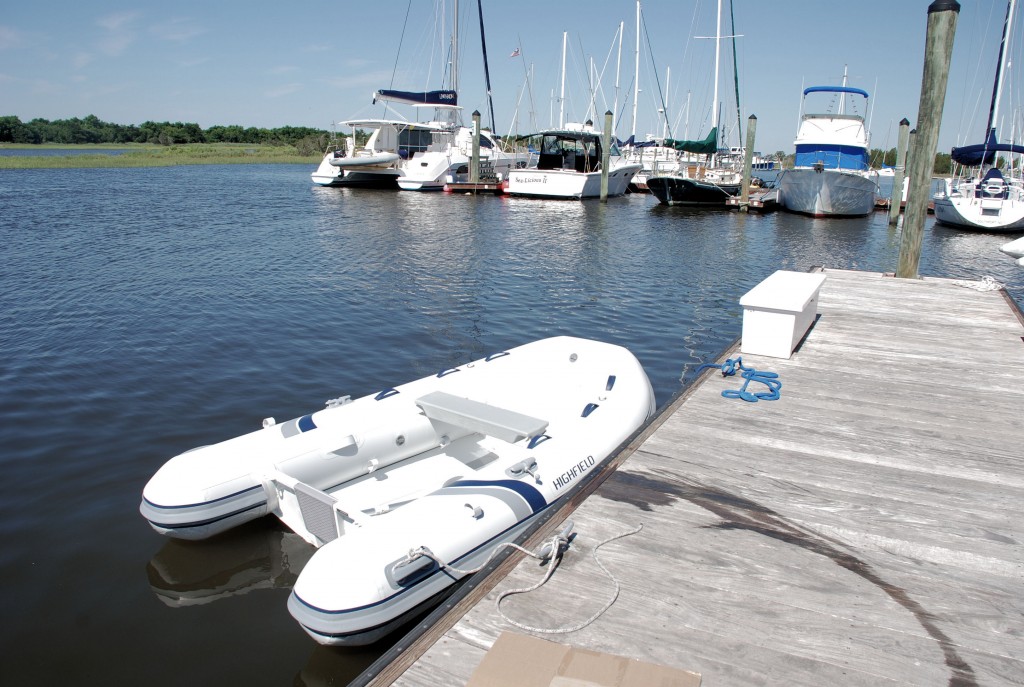
As written in previous posts, our old Zodiac Zoom dinghy finally bit the dust this year, and we purchased a new Highfield dinghy in June. I thought that it might help other cruisers who are looking for a dinghy if I dedicated a post to review the Highfield, as we benefited from the posts of others before us.

Our selection criteria:
We wanted something that was a little shorter than our Zodiac which was 10′ 3″ long. It frequently got caught or bumped in to stuff when docking Island Bound, and we thought a smaller dinghy might help. We also wanted an aluminum hull, which is rigid but less weight than the fiberglass models. We wanted something that was designed to be dry in choppy/rough seas. The Zodiac was very very wet, and there were times where we could not leave the big boat because it was too rough for the Zodiac. A bow locker to store our crap was not a requirement but was a nice to have.

The evaluation process:
We talked to lots of people that we met in our cruising route about what they were using and/or considering. Based on our experiences it seems like AB is the current dinghy of choice with the cruising community. We were told that before AB was founded, Caribe was the most popular, and employees of Caribe left and formed AB. In the process they built upon the successes of the Caribe design and made further improvements. Highfield was founded by employees of AB with the idea of making further design improvements and providing a lower price point. We found the price of the Highfield to be around $1,000 less than the equivalent AB model, and the Highfield comes with more accessories as well. We were a little nervous about Highfield because there aren’t as many out there yet, and we didn’t find a lot of public reviews online, but after talking to owners we saw while cruising we didn’t find one person that was unhappy with their Highfield.

What we got:
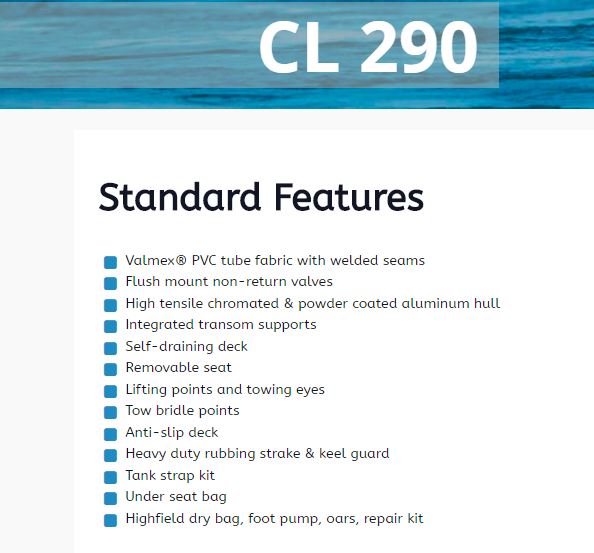
The following features, specifications and options for the CL-290 model are from the Highfield web site.
Highfield CL290 Standard Features
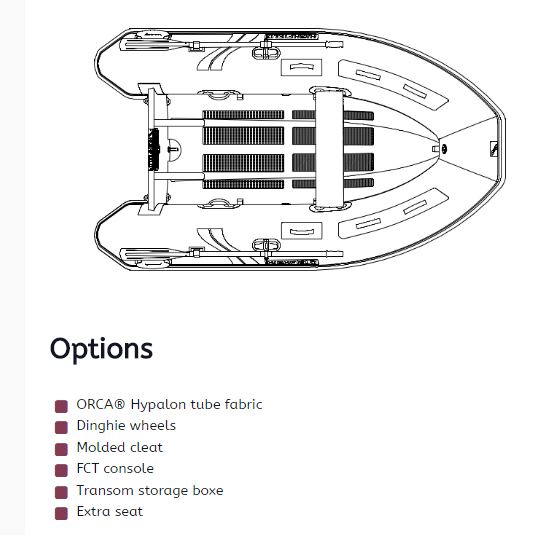
Highfield CL290 Options
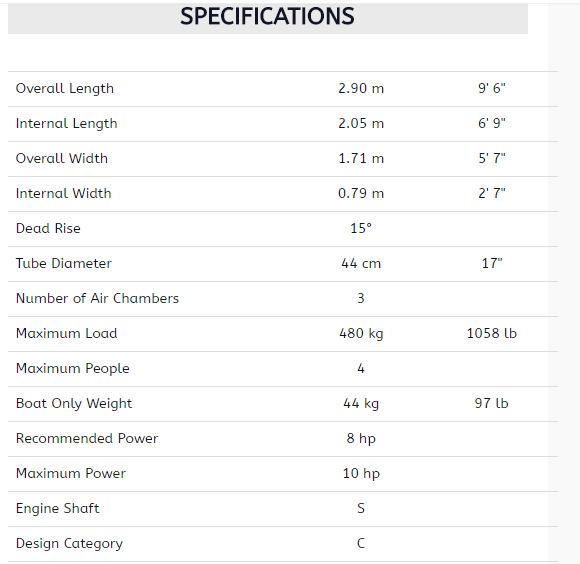
Highfield CL290 Specifications
We purchased a Hypalon version with a bow locker. It came with oars, a dry bag, one seat, a seat cover with padding and extensive storage, a patch kit, and a well designed foot pump.

Our review:
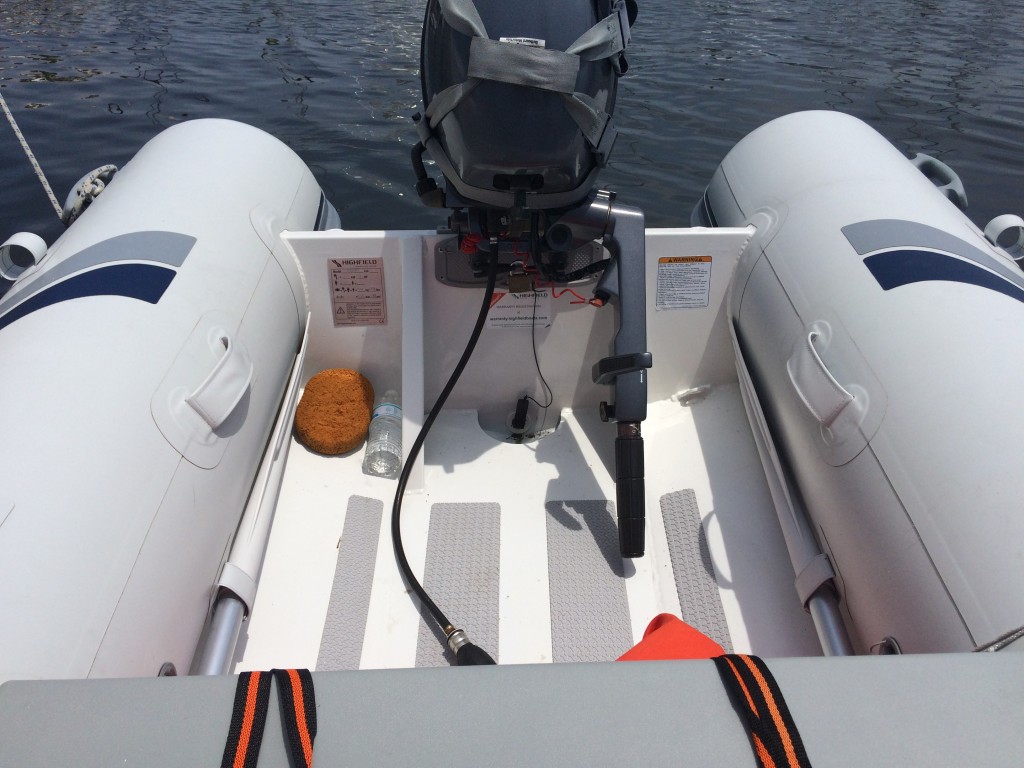
Overall, we really love this dinghy. It has 17″ tubes and a deep keel in the bow that becomes more shallow as it goes back to the stern, but it provides a deep, well protected interior. We have taken the dinghy across and through the lower Cape Fear River, which can be very rough on an ebb tide and can have large wakes from ships and high boat traffic. We would never have been able to do this in our Zodiac. The ride is dry and stable. This dinghy is very robust and stable. The design category of C is rated for 6′ waves, which we hope we never have to test, but we have taken on wakes and waves of 2-3′ with no problem at all. There is a flat double floor with rubber non-skid…I love the double floor. It keeps the dinghy dry and helps support stable footing. You can also run the fuel line under the floor if you keep the tank in the bow locker (we haven’t done that yet).
IMG_2432
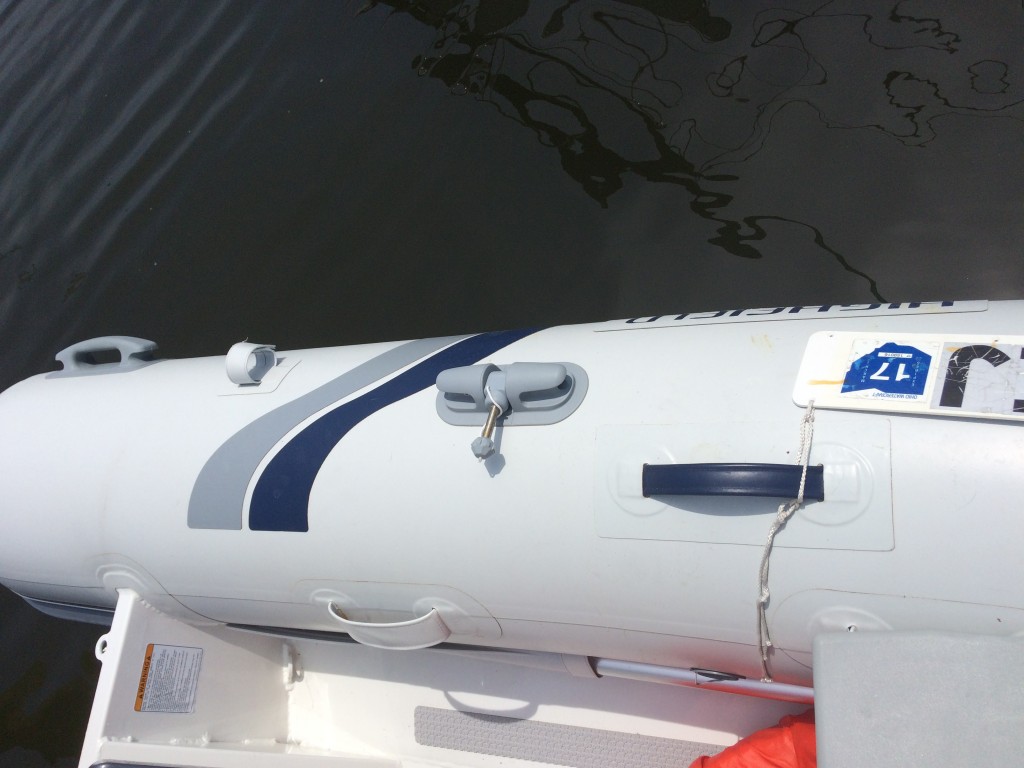
There are very robust lifting points built into the hull…2 sets on the transom, one low on the floor, and one high on the top of the transom; and two on the floor in the bow. This allows us to lift the dinghy very high on the davits (arms on the back of Island Bound), another improvement over the Zodiac. There are plastic protective rings inside the lifting points to protect the paint on the aluminum…nice design. The oars can be stored on top of the side tubes, ready for deployment, or can be stored inside along the sides with velcro straps. There are 3 large, robust, cleats attached to the outside of the tubes, one on each side of the stern, and one on the bow. They are excellent!
IMG_2433
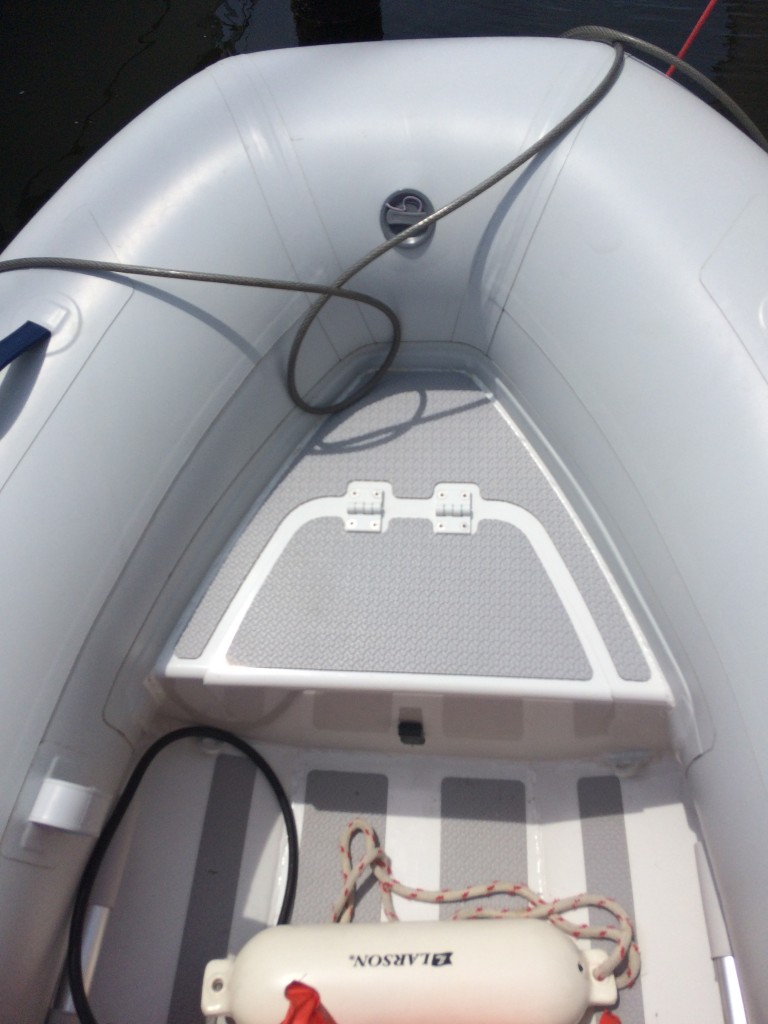
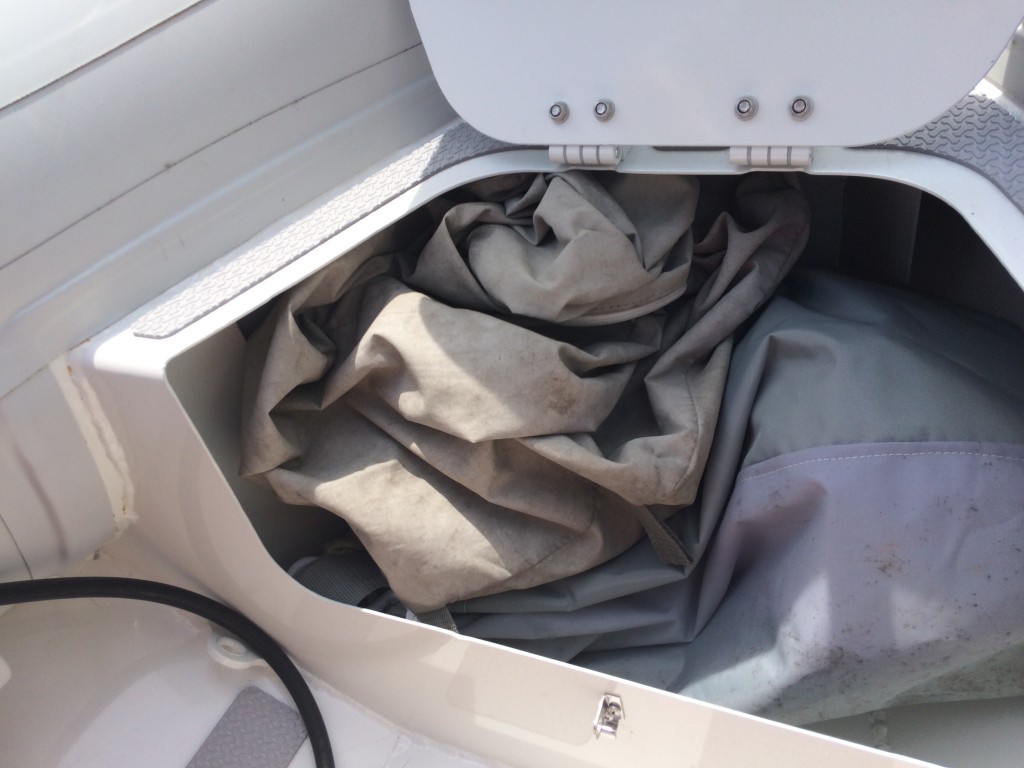
The bow locker is a nice feature. It provides lockable storage, a step to board the dinghy, and a seat. We keep our anchor and safety gear in the locker.
IMG_2430
IMG_2431
We have a 9.9 HP 4 stroke Yamaha outboard on the dinghy, and it takes about 20-30 seconds to get up on plane with Tricia, myself, a full tank of fuel, and a couple of beach bags of crap. I am not sure if we could get on plane with any more weight on board. It planes really well, but I wish we could get on plane a little faster. A fellow cruiser was able to improve the planing ability with prop modifications and fins on the engine, so we might experiment with that. Our only other negative is the seat. It is great that you can put it in 2 positions, but the plastic is slippery and it is hard to stay in place when you get in anything but smooth water. Also, the really nice seat cover, which has copious storage and is padded, slides back and forth. Maybe we need to do something different than we have. We will experiment with ways to improve the seat experience.

I would definitely buy this dinghy again and also recommend it hands down as a great cruising dinghy.

DSC_0051 fixed